project: paillard punch
This piece is for the Les Moulins de Paillard Contemporary Arts Centre in Poncé-sur-le-Loir, France. They are celebrating their inauguration in June, and I have designed a piece inspired by the old mill.
concept
The mill at Paillard dates back to the 17th century and was a thriving paper mill in the 18th century. I've been told it was also used as a textile mill. Here are some photos of the mill buildings at Paillard and a brief history.
My initial idea, which I've now expanded upon, was to explore the functions it had in the past and the function it now serves in its community. I decided not to do any "wearable tech" as that poses problems with presentation and I want to keep it simple in that respect at least. I'm also going to enjoy building something without the extra set of restrictions that comes with wearable technology!
I have done some research into the history of industrial weaving techniques and the technology that jumps out at me is, of course, the Jacquard Loom. The Jacquard Loom, invented in 1801 by a guy from Lyon, used punch cards to store patterns that were transferred onto the woven cloth. Punch cards were one of the first data storage techniques and were used much later in the computer industry.
There are many lovely parallels between weaving and modern computer technology. Binary code has two states: on or off, as does weaving: under or over. The grid pattern produced by interlacing warp and weft to make cloth can easily be imagined as pixels.
The punch card was put to use by engineers of both looms and computing, so it provides a really nice bridge between the past and the present. It also fits well that it's a paper product which, aside from having an additional historical connection with the mill, is considered very ordinary nowadays and almost the antithesis of "high tech". So it's nice to combine this "low tech" material with digital expression.
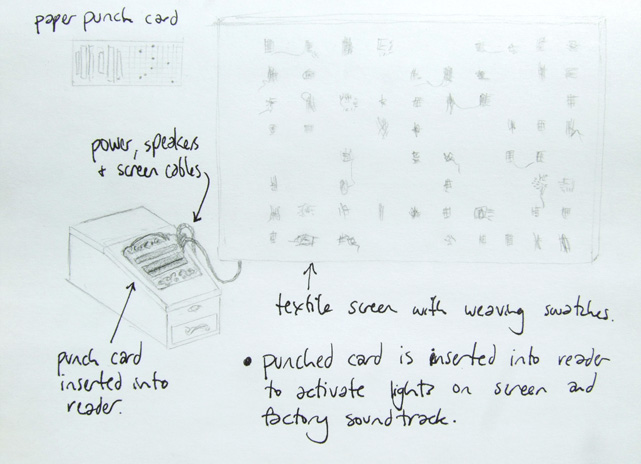
The concept is centred around punch cards and connecting the past with the present through sound. Each visitor will receive their own punch card onto which they can perforate a unique pattern. They can then put them into the card reader and the pattern they punched will appear lit up on a "screen". The screen will probably be made from linen with a matrix of small lights behind it and is primarily a way to give some kind of visual feedback, so that visitors can see that their punched information is being transferred. The pattern of holes in the punch card will trigger a different combination of looping audio tracks: factory sounds to represent noises of the old mill. The tracks selected with the punch card will all play at the same time, creating a layered audio of ambient factory sounds generated by the visitors' unique pattern of holes.
This is a rough sketch of how it should look:
video
The internets love a video, so here's a quick demo to show the machine in action.
progress: finished!
Here are some pics of the finished installation at the Paillard mill.
Mike and I cleaned up an old workbench for the card reader. We set it up so that visitors to the mill can hammer a hole in the card with a hammer and punch, because the hole made by the original punch wasn't big enough to make an accurate reading. James (one of the founders of the art centre) came up with an ingenious method for storing the punch cards, based on a Japanese weaving loom. We made it out of bits and pieces salvaged from the mill and the warp strands hold the cards in place.
The mill itself is such a beautiful and inspiring old building, providing the perfect environment for the piece. By the way, their aim is to have artist residencies at the mill, so if you're interested there is more information here.
 old cash box reading punch card
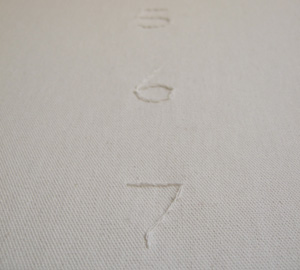 numbers embroidered on screen
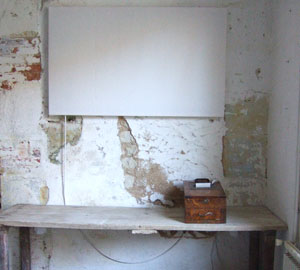 box and screen
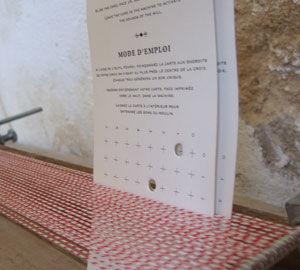 card storage system
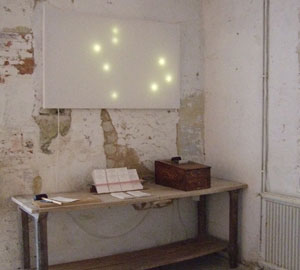 the machine in action
progress: backstage
Just wanted to document the guts of the reader. Using the techniques described in previous entries, I set up a 'sandwich' of infrared LEDs and sensors and attached it to the interior of the box. I'm very proud of the fact that I didn't have to alter the box in any way. :) I used a combination of sticky velcro dots and existing bolts inside the box from the previous mechanism. In the end it was a pretty tight squeeze, but everything, including the mac mini, fitted into the box!
The mac mini is necessary for running Processing which controls the audio. The program I wrote in Processing waits until it receives a signal from the Arduino that there is a card in the reader. It then receives, line by line, the readings from the Arduino. The Arduino controls the screen, while the mac mini loads and plays the sound loops based on which holes were punched.
The mill sound samples created by Mike and Tino sound really good. Exactly what I had in mind. I don't think these came out so well on the video, so I'll make a small demonstration when I get the chance.
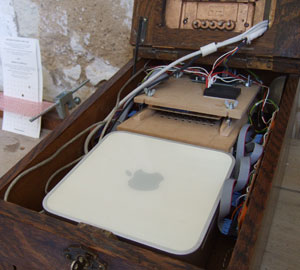 reader and mac mini inside the box
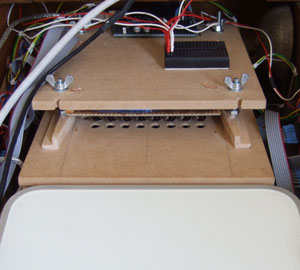 card slides between LEDs and sensors
progress: setting up at Pallard
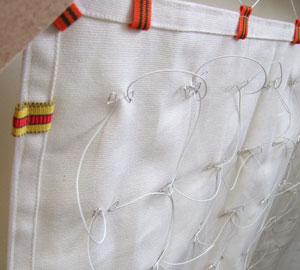
A few pics from setting up at Paillard, mainly involving finishing and setting up the screen. I made the frame for the screen so that it could be disassembled easily for transport. The four sides come apart and the inner screen (with the LED matrix) is suspended on hooks. It floats behind the outer screen, which is held onto the frame with velcro (the orange stuff in the photos).
I had originally planned to cover each LED with a sample of either hand- or machine-made weaving. I made 80 swatches (about half by hand) but when I tried them out, it didn't look so great. So instead, I decided to just embroider column and row numbers on the outer screen, to match the numbers printed on the punch cards.
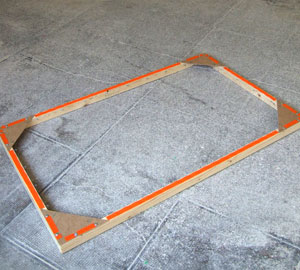 frame for the screen assembled
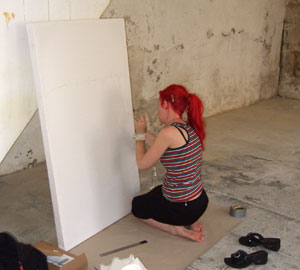 embroidering numbers on the screen
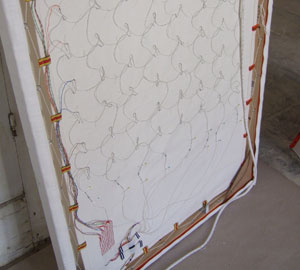 back of screen, showing inner layer
progress: almost done
Another quick update before the punch reader goes to Paillard!
I made ten rows of eight infrared transistors to read the punched cards. This is pretty reliable, provided the hole is in the right place, but works a bit slower than I would like it to. I've programmed the screen to pulse the rows of holes in as it reads them, so the user doesn't have to wait for a reaction from the machine.
The sounds are also nearly finished - they sound really good! When we're at Paillard and everything is set up, I'll make a video and post it here.
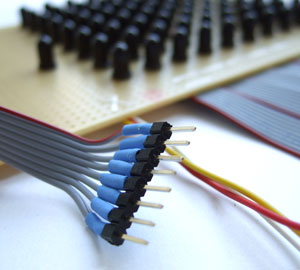 one of 10 header connections
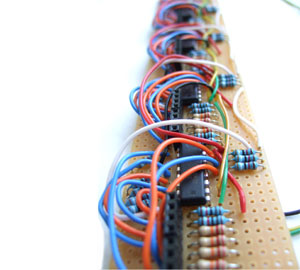 five of 10 shift registers
progress: punch card reader
The punch card reader is probably the most important component of the whole project, so naturally it has been causing me the most problems. Originally, I wanted to build a clever solution, as suggested by those clever people at META. The idea was to have a single horizonal row of infra-red LEDs and sensors (infra-red phototransistors) to count all of the punched rows. As the card was pushed into the machine (narrow side first), each row would pass over the sensors to be read and recorded. Registration of the position of the card would be handled by a vertical row of sensors that would be triggered by the edge of the card and be able to calculate how far the card had been pushed into the machine.
Buhht... for some reason, the sensors weren't reacting fast enough and the card would only be read if it was pushed in slow enough. So, it was back to my original caveman solution, which involves 80 separate infra-red LED and sensor pairs. Here is the completed infra-red LED grid. Each row can be turned on and off independently thanks to the shift registers.
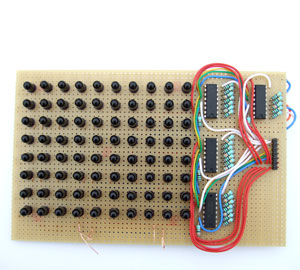 look at all those LEDs - just look at them!
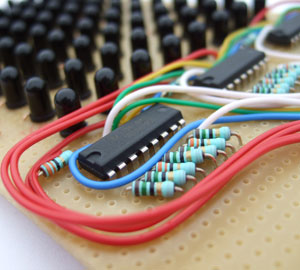 shift registers - LED puppetmasters
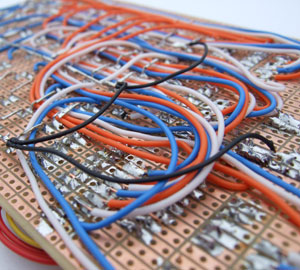 back view in sporty colours
progress: display screen inner layer
The display screen will be made up of two layers: an inner layer with an LED matrix and an outer layer with embroidery and weaving samples which the LED matrix will shine through.
To give an idea of the scale of the photos, the canvas screen is 130cm wide and 80cm high, whereas the driver circuit board is only 5cm wide. :)
 80 warm white LEDs sewn onto canvas
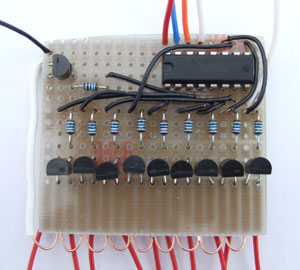 driver for the LED matrix
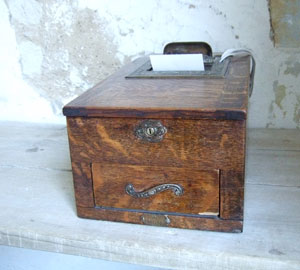
progress: punch card reader
Very exciting! I now have the box that will become the punch card reader! It is an old cashbox, I believe from the end of the 19th century. I've very carefully removed the mechanism inside for advancing the paper roll. I really don't want to damage this beautiful old box, so I'm really pleased I can use the slot in the top for inserting the punch cards into the reader.
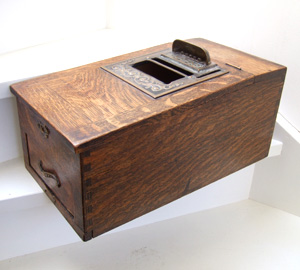 old cashbox
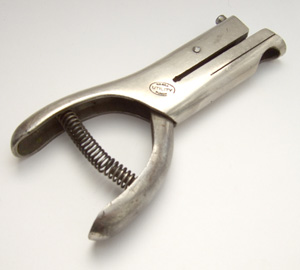 hole punch with long reach
progress: weaving for display screen
Since punch cards and weaving are at the core of my concept, I wanted to explore the weaving process a bit more. To me, weaving represents order from chaos - I love the way you can take a fibre, spin it into a thread and then arrange it into cloth. In the same way that weaving builds up one piece of cloth out of smaller components, I want to make each LED in the display matrix a tiny display in its own right. I have built two tiny weaving looms out of perfboard (handy stuff!) and I'm experimenting with different weaving patterns. I want to show the process from thread to cloth, so some of the LEDs will simply be covered in strands of cotton, while others will have swatches of machine-woven cloth.
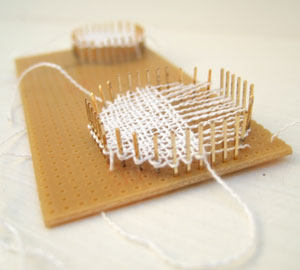 two tiny looms on perfboard
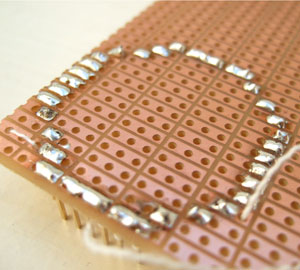 soldering the looms
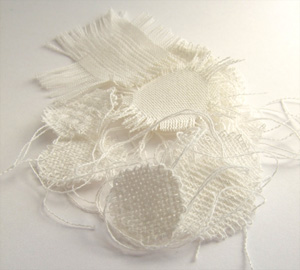 swatches for the display
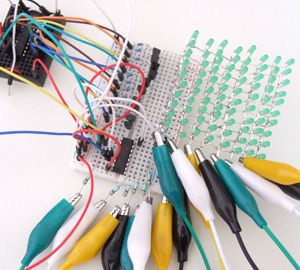
progress: LED matrix
I love instructables! User Syst3mX has published an instructable on how to build an 8x10 LED matrix. Here's a pic of my LED matrix. Of course this is only a prototype, but I will use the same technique for the display screen.